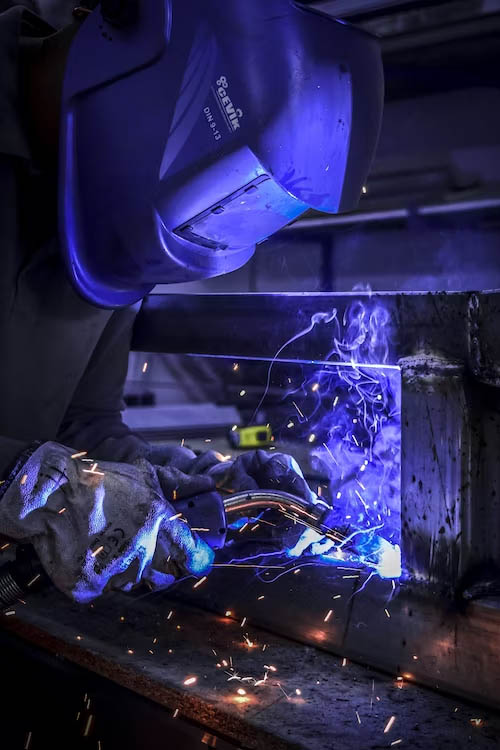


If you’re interested in precision welding and creating clean, high-quality welds, a TIG (Tungsten Inert Gas) welder is an excellent choice. TIG welding requires proper setup and configuration to ensure optimal performance and safety. In this complete guide, we will walk you through the step-by-step process of setting up a TIG welder. By the end, you’ll have a clear understanding of how to prepare your TIG welder for your welding projects.
Complete Guide to Setting up a TIG Welder – Step-by-Step Tutorial
Welding Town
Introduction
TIG welding is a versatile process that allows you to join various metals, such as stainless steel, aluminum, and copper, with precision and control. Before diving into the setup process, let’s briefly review some TIG welding basics.
TIG Welding Basics
TIG welding involves creating an electric arc between a non-consumable tungsten electrode and the workpiece. The arc generates intense heat, melting the base metal. A separate filler material may be added to create the weld bead. Shielding gas, typically argon, is used to protect the weld area from atmospheric contamination.
TIG welding offers several advantages, including precise control over heat input, the ability to weld thin materials, and the production of clean and aesthetically pleasing welds.
Setting up the TIG Welder
Follow these steps to set up your TIG welder correctly:
Step 1: Power and Ground Connections
Ensure the TIG welder is properly grounded by connecting the ground cable securely to the workpiece or welding table. Connect the power cable to a suitable power source and verify that the power switch is in the off position.
Step 2: Gas Supply
Connect the shielding gas supply to the TIG welder. Use a regulator to control the flow rate of the shielding gas. Refer to the manufacturer’s instructions for the recommended flow rate for the specific metal and welding application.
Step 3: Tungsten Electrode Selection and Preparation
Select the appropriate tungsten electrode based on the material you’ll be welding. Common types include pure tungsten (green), thoriated tungsten (red), ceriated tungsten (gray), and lanthanated tungsten (gold). Grind the electrode to a point and ensure it is properly installed in the TIG torch.
Step 4: Filler Material Selection
Choose the appropriate filler material based on the metal you’ll be welding. Different filler materials are available for various metals, such as stainless steel, aluminum, and copper. Ensure the filler material is clean and free from any contaminants.
Step 5: Shielding Gas Selection
Select the appropriate shielding gas for your welding application. Argon is commonly used as a shielding gas for TIG welding, providing excellent protection against atmospheric contamination. Other gases, such as helium or a helium-argon mix, may be used for specific applications.
Step 6: Adjusting Welding Parameters
Adjust the welding parameters on the TIG welder according to the material thickness and joint configuration. Set the appropriate amperage, balance control (for AC welding), and high-frequency settings. Refer to the welding procedure specifications (WPS) or the manufacturer’s recommendations for guidance.
Learn how to set up a TIG welder with this comprehensive guide. Follow the step-by-step instructions to ensure proper configuration for precise and clean welds.
Welding Town
Safety Precautions
Before starting any welding operation, it’s crucial to prioritize safety. Here are some essential safety precautions to follow:
- Wear appropriate personal protective equipment (PPE), including a welding helmet, gloves, and safety glasses.
- Ensure proper ventilation in the welding area to remove fumes and gases.
- Keep a fire extinguisher nearby in case of emergencies.
- Inspect the welding equipment for any defects or malfunctions before use.
- Follow proper electrical safety guidelines when connecting the TIG welder.
TIG Welder Maintenance
To keep your TIG welder in good working condition, perform regular maintenance tasks such as cleaning the torch, inspecting cables and connections, and checking for gas leaks. Refer to the manufacturer’s guidelines for specific maintenance procedures.
Conclusion
Properly setting up a TIG welder is essential to achieve high-quality welds and ensure safe operation. By following the steps outlined in this guide, you’ll be on your way to mastering TIG welding and creating precise and aesthetically pleasing welds.
 for Beginners 13")
FAQs
- What metals can be welded using TIG welding? TIG welding is suitable for welding various metals, including stainless steel, aluminum, copper, and titanium.
- Can I weld thick materials with a TIG welder? Yes, TIG welding is capable of welding thick materials. However, it may require multiple passes or specialized techniques for thicker sections.
- Do I always need to use filler material in TIG welding? No, filler material is optional in TIG welding. It depends on the joint configuration and specific welding application.
- How do I know which tungsten electrode to use? The choice of tungsten electrode depends on the material you’re welding. Different electrode types have specific properties and are suitable for different applications.
- How often should I perform maintenance on my TIG welder? Regular maintenance is recommended to keep your TIG welder in optimal condition. Perform maintenance tasks as outlined in the manufacturer’s guidelines or as needed based on usage.