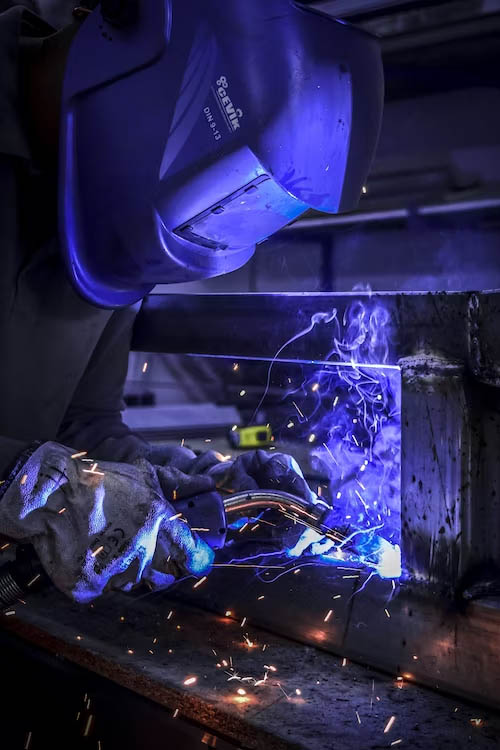


The plasma cutter is a tool that many people are able to afford to have in their home workshop. The prices have fallen to levels where even the backyard mechanic can own a plasma cutting torch to help them fabricate parts for their car remodel or just build metal objects. Plasma cutters operate with a high-voltage arc that melts the metal as it cuts through it. Unlike bulky oxy-acetylene tanks, plasma cutters are portable and can run on regular household current. As great as plasma cutters are, as an owner, you will still run into some problems and malfunctions.
The Most Common Problem – The Plasma Cutter Is Too Small For The Metal Thickness
This is the most common issue we have seen to date.
When it comes to plasma cutters, bigger is generally better (only exception to this is if you want a very precise cut for example fine cutting for artwork). No matter what the manufacturer claims on their sales page. In the real world the machine may just not have enough oomph to get the job done.
So, keeping this in mind, whatever maximum metal thickness you think you will cut. Buy a cutter that is one step up. At least a ½ inch or 50 amp plasma cutter (and a suitable air compressor). Anything less and you will probably be restricted to cutting sheet metal only.
You may also find the amount of consumables you save in a year with a bigger machine will pay for the larger unit.
Insufficient Or Excessive Air Pressure
Consult the owner’s manual if in doubt and make sure you maintain optimal air pressure for the amperage being used. Each cutter will be different so it’s good to double check the recommended air pressure settings.
Air Pressure Is too High
If the pressure is too high this will dissolve the arc column and weaken the power of the plasma arc.
Things to check:
- Air compressor pressure
- The pressure between the Air filter and air compressor
- If the air filter relief valve is faulty or set too high
Air Pressure Is Too Low
If this occurs then an optimal plasma arc cannot be formed. This will result in a poor quality cut and built up slag.
Things to check:
- Is the compressor providing enough air?
- Are the air channels blocked?
- Is the air filter relief valve set correctly?
Hypertherm Plasma Cutter Troubleshooting
All torches need three ingredients to produce a pilot arc (plasma gas, DC Power, AC high frequency). If you are experiencing issues starting the cutter, first check the pilot arc:
- Raise it a few inches from the material
- Fire the torch. After a few seconds of air flow you should see an arc form.
- The arc should be smooth and steady
- Repeat this several times.
If you are not getting a smooth and steady pilot arc or the torch fires intermittently. You may have a problem with hard starting.
Hard Starting
This issue occurs for a couple of reasons:
- Insufficient HF (high voltage spark)
Have a close look at the electrodes, is it dirty or covered with moisture or metal dust? If it needs cleaning try blowing it off with an air hose. Some people use a metal brush to clean the torch tips after every use.
- Too much air pressure
Check the air pressure. If there is too much pressure the pilot arc is basically blown out before it can form.
Plasma Cutter Not Arcing
Is your cutter having any of these issues?
The fan started
- Power LED turned on
- Air blew through the torch when the trigger was pressed.
- But there was never an arc nor any cutting.

Solution:
Chances are there is a burned-out component(s) inside. If the cutter is still under warranty. Call the manufacturer (do not open it up as you will void the warranty).
If, however, the unit is past warranty and you are handy with these things then once you open it up, discharge the power, and look for broken parts. Some of the most common ones are:
- Blown diode,
- The leaking capacitor (oozing out the top),
- Burned-up resistor,
- Broken relay,
- Broken chip/ MOSFET (chunk missing from the chip).
Contact your local welding store for some advice and parts.
No Arc Between The Contacts
No arcing between the contacts. When I removed the swirl ring, there was an arc. Although the arc can cut or melt through metal, it’s not the correct cutting process, because the swirl ring is required for plasma cutting. I’ve replaced all three components- tip/nozzle, swirl ring, and electrode, set the compressed air at different levels, and removed the casing to check. However, I didn’t find any burnt circuits or components.
Solution:
Well, turn the machine off before messing with the metal parts.
Remove the cover.
Check your point gap. Your problem is likely that the spark gap has to be widened to around .040″ to increase the spark voltage at your torch.
The pad that contacts the electrode may move away from the electrode under air pressure. A spring on the pad shaft may be overcome by the air pressure and push the pad away from the electrode. The spring may get too hot and fatigued causing the pad to not return to electrode contact after the switch is unkeyed. The pad needs to contact the electrode at key up when the air moves it away from the electrode a gap is created causing electrons to flow through the gap to allow the plasma to be produced and to flow. Replace the spring.
Make sure it is clean and set correctly. Hope this helps.
The Resistor Gets Very Hot
The plasma cutter isn’t working, and the resistor gets very hot.
Solution:
Remove the cover and inspect the inside the lower front part of the unit and hold the torch switch to see if you are getting a spark inside the unit there. If you don’t see any spark inside the unit while holding the torch trigger, then something has failed on your lower board there.
Check out the resistor which is located behind the arc points and is standing upright. Remove the board unsolder and install the new one. Hope, it’ll work correctly.
Routine maintenance of your plasma cutting machine equipment
Use Grounded Connections
One of the problems people run into with plasma cutters is that they do not plug them into 3 pronged, grounded outlets. The outlet may have the third prong available, but it isn’t set up as a true grounded outlet. The plasma cutter must be grounded correctly in order for the electrical arc to work.
Grounded Clamp not Connected
The plasma cutter must also be grounded through the workpiece. There is a grounding clamp that must be connected to the workpiece, near where you are making your cut. This completes the circuit so that the cutter can create the charge it needs to melt away the metal. Make sure the connections on the ground clamp are good.
Keep Air Pressure Up
As the cutter is working, the built in air compressor does the work of blowing away the cut material and debris. The cubic feet per minute rating on the air compressor should be set at the specified amount that is determined in the owner’s manual. Make sure that you can keep this level maintained.
Clogged Cutting Tip
As the plasma cutter is working, there is a tendency to collect dirt particles and metal slag. This slag, or metal dust, can cause the electrical current to discharge and not make a good connection. When this happens you should stop cutting and wipe off the end of the tip to clean it of any dust or slag.
Burned Tip
One inherent problem with the plasma cutter is that it can burn through tips very quickly. As the cutter is working, it will burn back the tips so that the cutting hole is misshapen. This hole must be a specified diameter. If it gets any larger the conductivity of the electric charge will not work as efficiently. Keep a supply of new cutting tips on hand so you can quickly change them.
Unclean Cutting Surface
Since the plasma cutter works through making a conductive connection with the piece that it is cutting, you will see problems when the metal surface is dirty. Make sure you take the time to clean the surface of any dust, oil, rust, or other contaminates that can hamper the electrical current.
Clean Tip
After some use, the tip can build up a lot of dust. Like a battery cable, this will cut down on the amount of charge it can build up. Use an emery cloth to wipe off the cutting tip so that it has a shine to it. This will help it make a stronger conductive electrical charge.