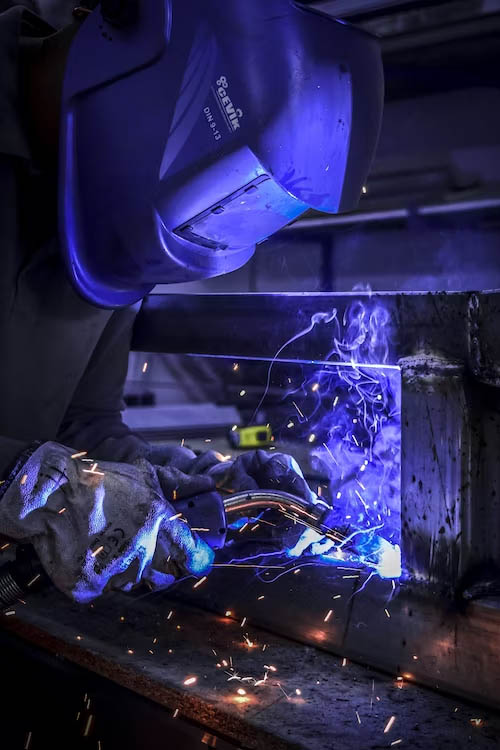


Trying to TIG weld stainless steel at first can feel like a horrible nightmare. Have you ever set up your welder exactly like your professional workmates and still produced an ugly weld? It’s always a frustrating feeling.
8 Improvements to Your Stainless Steel TIG Welding
Welding Town
However, with a few tips, you can turn this situation around. From the right electrode to a clean workpiece, gas tips, speed, and a few other essential tricks, your next TIG job can be a masterpiece. Take a deeper look at these eight tips and you’ll be able to improve your next TIG welding project.
1. Use the Right Tungsten Rod
Various types of tungsten rods are available. The composition they contain, whether they are pure tungsten or tungsten rods with additives, will not make much difference to the quality of the weld. Some tungsten rods are easier to arc than others, and some are more durable than others, but it is the diameter of the rod that you need to be concerned about to ensure a quality weld.
If you use a larger diameter tungsten rod to weld light sheet metal at low currents, your weld will have a hard time starting an arc, and even if it does start, the weld will not be smooth and consistent. The heavier the stainless steel you are welding, the larger the diameter of the tungsten rod should be. The chart below shows the appropriate tungsten rod diameter for your plate size, and the range of amperage to match.
| Material thickness | Tungsten diameter | Amp range |
| 1/16 | 1/16 | 80-20 |
| 3/32 | 1/16 | 100-30 |
| 1/8 | 3/32 | 120-150 |
| 3/16 | 3/32 | 150-250 |
| 1/4 | 1/8 | 200-350 |
| 1/2 | 1/8 | 235-375 |
2. Clean Your Metal
All weld joints must be cleaned before welding, especially stainless steel tig welding. Every stainless steel welder needs to have a “no shortcuts” mentality, and this applies especially here. Tig welding can create air bubbles, which not only increase the weakness of the weld but also impede the smooth movement of the weld, which prevents the formation of a clean weld.
How dirty the material is will determine how you should clean it. A clean rag will sometimes work, but acetone or other thinner is an effective choice for cleaning stainless steel because it effectively removes all substances and evaporates quickly.
3. Use a Clean Sharp Tip
While a tungsten tip free of dirt would certainly help, this is usually not the case. Typically, the tungsten rod is cleaned before welding. What often happens during tig welding is that the filler rod comes into contact with the hot tungsten tip and melts a blob of something on it, which is known as a dirty tungsten tip.
When the tip becomes dirty, the arc distorts and thus loses control of the target. The shape and accuracy of the arc depend on how the tip is polished. The finer the tip and the smoother the surface, the cleaner and more precise the arc will be. If you have metal fouling on the tip, it can turn a small, stable arc into a wobbly, off-axis shape.
4. Increase Gas Coverage
Any air that enters the weld will create impurities in the weld and will change the color of the stainless steel. For economic reasons, the more gas used, the neater the weld will be. It’s not just that a higher gas flow is better. Using a wider gas cup to give more gas coverage will make a big difference to the weld.
It is a good idea to use at least a 12-gauge gas cup when the welding space allows it. Sometimes the weld area is so narrow that you can only use it in these situations.
5. Increase Your Speed to Minimize the Heat
The higher the heat in stainless steel tig welding, the worse the weld will look and the more warped the project will be. However, this does not mean you should lower the amperage. This requires slower speeds and therefore creates more heat input overall.
The key is to weld using enough amperage so that the weld does not break through or cause undercutting while moving as fast as possible without compromising weld accuracy. This will vary from person to person due to individual capabilities. A general guideline is to weld with less than 10% of the amperage per 0.001 inch of stainless steel and weld fast enough to meet the heat requirements.
6. Choose the Right Filler Wire
There are various types of filler wires that can be used, and their size and material can have a big impact on the quality of the weld. First, make sure they match the type of stainless steel you are welding. Do not use 316 welding rods to weld 304 stainless steel sheets. The material type must be of equal or greater strength and quality or the weld will be weaker than the parent metal. Welds must always match or exceed the strength of the parent metal because they are always a natural weak point.
It is also important to use the proper size electrodes for welding. Using thick wire and low-amperage welding rods on light sections will produce unsightly weld lumps rather than stable, smooth welds. Using fine gauge filler wire and high amperage can be effective in melting the wire, but it isn’t easy to keep up with the correct amount of filler wire. This will either produce a thin weld that lacks weld volume or an inaccurate weld due to excessive wire feed speeds.
Before you start welding, test on a practice area to find the right size to make sure the filler rod diameter is right for you.
7. Back Purge Your Job
Back purging a weld is the process of keeping the backside of your weld in an environment shielded from air. You can achieve this through a purging kit or by covering the backside of your joint with aluminum wrap and a shielding gas line feeding into it.
The oxidation that occurs from the underside of your joint being exposed to air not only causes an ugly look behind your weld but also affects the way your weld runs. Back-purging your weld will ensure your bead is formed more smoothly, and it keeps the color and deformation out of both sides of your joint.
8. Let Your Project Cool
Stainless steel can overgrow and warp when exposed to heat. It can also develop the familiar red, blue and black colors on welds. These colors are caused by overheating. Welding always requires heat or the metals wouldn’t weld together, but the heat on stainless steel is due to the work heating up more than needed.
Did you know that it is possible to weld joints beautifully and with good penetration without any color? This should be true for every weld. There may be a little color, but if your welds are excessively red and blue, or even worse, black, it’s because the work is heating up too much. As mentioned earlier, excessive heat in the workpiece is due to the arc staying in the same position for too long, not excessive amperage.
To solve the problem of heat build-up, a good practice is to give welding a break from continuous running. When starting to weld a section, if you notice that the weld is getting hot or starting to discolor, stop and let the weld cool down a little before continuing. Not only will this prevent discoloration, but it will also prevent any heat distortion from ruining your project.

Final Thoughts: Improving Your Stainless Steel TIG Welder
Stainless steel tig welding can be done well if the right steps are taken. The main reason people have so much trouble with this is that they take shortcuts. You can’t take shortcuts with stainless steel welding. It will always come back at you with unsightly welds and often ruined projects.
Follow the right steps and the quality of your next TIG welding job will be much better.
? 14")