


If you’d like to learn how to MIG weld steel, this Instructable will provide you with the knowledge to unlock your MIG welding potential.
How to MIG Weld Steel for Beginners :
Welding Town
7 Steps – Instructables
MIG welding stands out as the most suitable and beginner-friendly welding technique due to its simplicity. Many beginners become discouraged when attempting to start with other methods like stick or TIG welding.
The reason for this is that mastering the art of striking an arc with a stick welder can take days, and TIG welding is a considerably more advanced process primarily used for specific applications.
With MIG welding, all you need to do is pull the trigger on a MIG gun. The wire feeds out, and you’re ready to weld. There’s no hassle of dealing with stuck welding rods or manipulating foot pedals to control amperage. It’s straightforward welding, which is why it appeals to many beginners.
Who wants to wrestle with a welding process that’s needlessly challenging, especially when you’re a hobbyist or DIY enthusiast?
Below, I outline ten recommended steps for newcomers seeking to master MIG welding quickly.
Step 1: Selecting the Right MIG Welder
A common mistake beginners make is overestimating the power of their welder. Most of us don’t have a shipyard in our backyard, so there’s no need for a machine capable of welding 1-inch thick steel plates. Such power is excessive for home hobbyists and DIYers.
Realistically, most beginners will find a 140 amp or 185 amp MIG welder more than sufficient. These machines can handle steel ranging from 1/4 inch to 1/2 inch in thickness. This power range is typically more than adequate, and you may not even need the highest amperage setting.
Ensure that your MIG welder can accommodate a gas tank. If you purchase one without this option, you’ll be limited to welding with flux core wire, which can be limiting if you want clean slag-free welds or if you plan to weld aluminum.
It’s not advisable to seek out the cheapest MIG welder available. Many low-cost options compromise on quality components, and you’ll notice the difference when compared to a slightly more expensive unit. It’s often better to invest in a used welder from a reputable brand than to opt for a new, low-quality one.
Step 2: Obtaining the Proper Welding Safety Gear
Learning how to MIG weld steel is much more enjoyable when you prioritize safety. Certain essential safety equipment is necessary to protect yourself from harm. I’ve witnessed numerous cases of individuals suffering arc burns that resemble the effects of prolonged tanning booth exposure.

The ultraviolet rays produced by MIG welders are highly damaging to exposed skin. Therefore, it’s crucial to keep your arms covered at all times. Contrary to what you might see on TV, welding in short sleeves is a risky mistake that can lead to long-term consequences.
Here’s a list of essential welding safety gear:
- A welding helmet
- Welding gloves
- Leather boots or shoes
- Cotton clothing (avoid windbreaker-type materials)
- Welding sleeves or a jacket (especially useful for overhead welding)
- A welding curtain if there are children nearby
Step 3: Fine-Tuning Your MIG Welder
Learning how to MIG weld steel is remarkably straightforward, provided your welder is correctly tuned. Before you start your first MIG weld, it’s essential to adjust your welder properly; otherwise, your welds will suffer.
Here’s why:
Your MIG welder has a wire feed rate setting. If the wire feeds too quickly, it won’t melt at a consistent rate during welding. As a result, when you pull the trigger, the wire may stab into the weld puddle instead of melting evenly.
To resolve this issue, you need to reduce the wire speed. Don’t worry; your welding machine will have a chart indicating the precise settings for wire speed and voltage.
Step 4: Maintain a 15-Degree Gun Angle
When MIG welding, a shielding gas tank is used to protect the molten weld puddle from the atmosphere. This gas is crucial for producing strong welds. Therefore, it’s important to maintain a 15-degree travel angle while welding. This angle allows you to see the weld puddle clearly and ensures proper gas coverage.
If the MIG gun is angled too steeply, the gas won’t adequately shield the weld, leading to porosity. Alternatively, if you don’t have access to a gas tank, you can use flux core wire. Instead of relying on gas for protection, flux core wire is filled with flux, which serves the same purpose.
This is known as flux core wire welding, and it’s suitable for welding in windy conditions and on dirty metals. However, welding with flux core wire may not provide the same visibility of the weld puddle as using gas.
Step 5: Pull the Trigger
Once your welder is properly tuned, and you’ve positioned the gun at the correct angle, it’s time to pull the trigger. Several things will occur:
- An arc will form
- The wire will start feeding out
- Gas will flow from the nozzle
You should maintain a pace that allows for a good, hot weld without burning through the metal. As a rule of thumb, weld as hot as possible without burning through. Depending on the thickness of the metal you’re welding, you may move approximately one inch every ten seconds, although this can vary.
It’s advisable to start with thinner steel as it allows you to observe how heat affects the workpiece. Thick steel doesn’t provide the same level of visibility.
Once you’ve mastered welding a single bead, you can progress to welding joints.
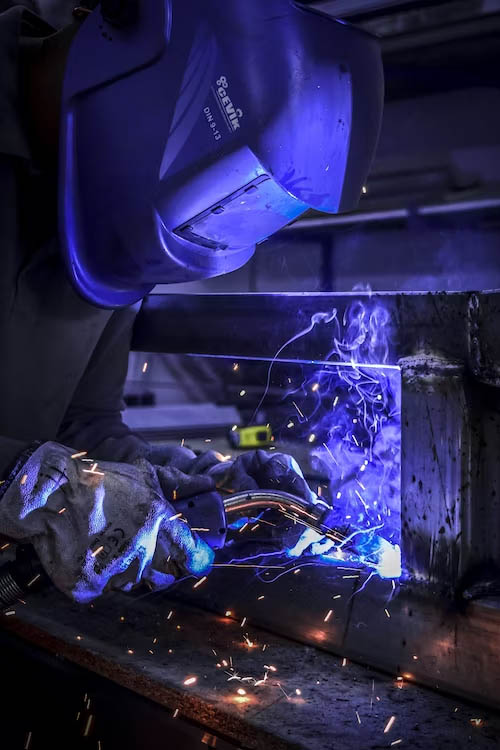
Step 6: Monitor Your Weld Bead Size Closely
One way to gauge whether you’re moving the weld bead too quickly or too slowly is by examining the size of the weld bead. Aim for a result similar to the image provided, and you’ll be on the right track.
Problems arise when your welds turn out thin and snake-like, indicating that you’re rushing the weld and not achieving adequate penetration. A good indicator of proper heat input is the “blueing” that occurs after completing the weld.